Search Tropical Organic Garden

Showing posts with label tropical organic garden. Show all posts

October 24, 2014

How to Make a DIY Self Watering plant Container

A DIY Self Watering plant Container is a gardener's dream. Self watering plant containers have water  reservoirs from which plant roots can wick up water according to the plant's need. A huge benefit of this is that gardeners can water less frequently without drying out plants. As you will see below, this simple and cost effective design even ensures that plant roots will not rot in the water.


To build this DIY Self Watering plant Container, you will need the following.

  • 2 containers. They must allow for one to fit into the other with some air space between the bottoms of both. That space will create the reservoir of the DIY Self Watering plant Container 
  • A basket of some kind. If you do not have a basket, a plastic bottle from the kitchen can be used and converted into a basket. As pictured immediately below, a small plant pot is fine. However, as you will see a few photos later, I changed my mind after taking the photo below and used an old vinegar bottle from the kitchen. The basket should be roughly the height of the air space between the bottoms of the 2 containers. 
  • As a watering hole, narrow pep bottles that jointly measure the height of the top container or a narrow PVC pipe. In this case, I used 5 gallon containers and found that two 500 ml pep bottles served this purpose.
  • To protect the watering hole from mosquitoes and strain leaves and other debris, use an old cotton sock. Some people prefer to completely cover the opening with a PVC cap to fit the watering hole diameter 
  • To cover the base of the top container, cotton fabric that is a little larger than the base of that (bottom) container. In this case, I used a crocus bag. However, since crocus bags disintegrate very quickly in the garden, I prefer using old t-shirts as they lasted much longer for other of my DIY Self Watering plant Containers. 
  • Twine or roughly 4 cable ties
  • A drill set
  • -- --
  • Something to cut the pep bottles or 'basket' bottles. A serrated knife or saw will usually suffice
  • A saw


How to make a DIY Self Watering plant Container - Things you will need
Some things you will need to make a DIY Self Watering Plant Container. See the full list above.
As pictured immediately below, drill holes in the base of the top container. These holes will allow excess water to drain into the reservoir.
How to make a DIY Self Watering plant Container - Drill holes into the base of the top container
How to make a DIY Self Watering plant Container: Drill holes into the base of the top container 


-- --
In order to accommodate the basket, cut out a hole in the base of the top container. That hole should accommodate the diameter of the basket. (In the image immediately above, it was unnecessary to drill the hole in the center. After all, a saw will be used to create the space for the basket, just on the inside of the next set of circles of holes).

If your basket will be made from a bottle, cut off the top. If your basket container does not already have holes, make holes at the bottom and along the sides as pictured immediately below. Ensure that the top edge of the basket has roughly 4 holes. You will need to thread twine or cable ties through and between these holes and the nearby ones in the base of the top container. This will prevent the the basket from shifting.

How to make a DIY Self Watering plant Container


In addition, make a second hole in the base of the top container to very snuggly accommodate the watering hole. As shown immediately above, draw the edge of the circle before cutting the hole to avoid any mistakes.


How to make a DIY Self Watering plant Container

If your watering hole will be made of pep bottles, cut off their bottoms. The picture immediately below shows the first upside down bottle in the container. The mouth of the second bottle will fit upside down into it.
-- --
As shown immediately below, place the watering hole cover over its top end. Cover the base of the bottom container with fabric. Be sure to push fabric into the basket so as to line it. The soil will be placed within that cavity. Consequently, that soil will always have direct access to the water reservoir in the bottom container. 
How to make a DIY Self Watering plant Container for a tropical organic garden


How to make a DIY Self Watering plant Container for a tropical organic garden

As pictured immediately below, drill about 2 holes on the side of the bottom container at the height just below where the top container reaches when placed within it. These holes will ensure that excess water can flow out of the reservoir rather than swamp the soil.
How to Make a DIY Self Watering plant Container

You can now add soil and your plant. Hooray!


How to make a DIY Self Watering plant Container for a tropical organic garden
This DIY Self Watering plant Container  has a piece of drift wood  as a trellis. The red stem is part of the small Malabar spinach that is growing inside. Behind in a corner are garlic chives. Look closely at the center left of the image to spot the top of the watering hole that was covered with a now gray brown sock. 

How to make a DIY Self Watering plant Container for a tropical organic garden
This DIY Self Watering plant Container uses a guava branch as a trellis for the malabar spinach. Look closely to the center left to see the the watering hole that was covered with a crocus bag. The crocus bag is disintegrating. 

CONTENT RELATED TO MAKING A DIY SELF WATERING PLANT CONTAINER


October 09, 2014

How I Grow Sweet Potato From Slips in my Tropical Organic Garden

As you may recall, I grow sweet potatoes because their leaves are edible either raw or cooked. Since I did not explain how to grow sweet potato slips in earlier posts, I will do so now.

How to grow sweet potato slips


How to grow sweet potato slips from supermarket groceries
15 Sep: Growing sweet potato slips from store bought sweet potatoes
Sweet potato slips are small sprouts that you can grow from sweet potatoes or sweet potato vines. Some weeks ago, I did not have ready access to larger sweet potato vines and therefore bought non GM organic sweet potatoes to start growing slips. (See how to identify non GMO produce). 

As you can see, I placed one end of 2 potatoes into water. Ideally, I should have used toothpicks to suspend about half of the sweet potatoes in water. In that case, the sweet potato in the cup just sat in water to roughly half of its body. As you can see, the clear jar was too narrow for the second potato. However, the growth rate was comparable with that of the other potato. See the roots for both cases below.
How to grow sweet potato slips from supermarket groceries. View of sweet potato roots
15 Sep: Roots for the sweet potato in water in the jar
How to grow sweet potato slips from supermarket groceries. Sweet potato roots.
15 Sep: Sweet potato roots for the sweet potato in the cup. 

How to grow sweet potatoes from slips

I decided to pluck off some short slips of roughly 6 inches. It is simply a matter of plucking them off the sweet potato. It would be better to use a knife or, better yet, a pair of scissors.
16 Sep: Sweet potato slips of roughly 6 inches

I then planted the sweet potato slips into moist earth. In the case immediately below, this single sweet potato slip is in shade.
16 Sep: I planted sweet potato slips of roughly 6 inches

In the next image below, these 2 slips are in a container in more sunlight. Unfortunately, the heat appears to have stressed them too much. Although I actually covered them at night with a plant pot, slugs and or snails still devoured them within a few days. One did not last more than 24 hours. Interestingly however, the one in the shade has survived without any protection at all. This was unexpected because, in addition to being unprotected (by plant pots or any other measure), the single slip was much closer to the ground and more accessible by snails. The moral of this story appears to be that the more exposed slips might have been planted too soon and could not yet handle the stress caused by intense heat and light.
16 Sep: I planted sweet potato slips of roughly 6 inches
In light of the above mentioned 'loss of life', I resisted further  temptation to plant the sweet potato slips too soon. Consequently, I allowed the slips to grow for a longer period indoors. 

I digress! As usual, the Natural Law of Correspondence carries life lessons in nature. One lesson might be that parents need to protect their young for a while before prematurely letting the young out into the world. I have long come to feel like my plants are children. I know I am not alone in feeling guilty over carelessness in my gardening. After all, your plants depend so heavily on your level of care which makes an enormous difference in whether they survive and how well they grow if they survived at all. I suddenly recall a Youtuber's inability to understand why we personalized an aloe plant in a 'how to care for aloe' video. I had also recognized that there was a symbiotic relationship. Specifically, that aloe plant was in turn caring for me by providing healing properties and many other personal care uses. Though they do not talk (a limited way in which humans recognize communication), plants react directly to their treatment. In short, there is no doubt that a relationship exists between humans and their plants.
The sweet potato slips look like a bouquet
25 Sep: The sweet potato slips look like a bouquet

Anyway, back to gardening! 

This photo above does not do justice to them. However, these slips started to look so much like a pretty green bouquet that I began to like displaying them in the dining area. I plucked off one slip. It measured roughly 1 foot.
The sweet potato slips look like a bouquet. Roughly 1 foot
25 Sep: The sweet potato slips look like a bouquet. I plucked off this slip. It is roughly 1 foot.

In the following photo, you will see what happens when the sweet potato slips can no longer stand tall. Notice below how much more developed the roots developed.
Growing sweet potato slips indoors.
4 Oct: Growing sweet potato slips indoors. 

Growing sweet potato slips indoors.
4 Oct: Growing sweet potato slips indoors. 

The following was a shocker to me. Look closely at the image below. Can you see those tiny black specs on the leaf and tiles? Guess what they are. No, they are not food crumbs of any type. 
Growing sweet potato slips indoors.
4 Oct: Growing sweet potato slips indoors. Caterpillar droppings.
 I have not yet figured it out. How on earth did caterpillars develop on my indoor potato slips. The windows are all meshed. Could this have occurred because I left them outside for about 1 day (when I was cleaning) or perhaps the nearby open top compost bin in my kitchen? How did this happen?
Growing sweet potato slips indoors. Caterpillars indoors.


RELATED POSTS:

September 01, 2014

How to propagate and grow basil from cuttings

If you have several sweet basil plants, you can use 1 or 2 of them as your mother basil plants from which you propagate numerous others. By following these steps, you could train your mother sweet basil plants to multiply its number of stems from which new clone cuttings can be created.

To propagate sweet basil from cuttings, you will need:
scissors, sterilised cleaned with rubbing alcohol, cups, water, roughly 1 to 2 weeks, a sunny window sill in which the basil cuttings can be placed

How I successfully propagate sweet basil from cuttings
  • Select the healthiest looking stem tips that do not have flowers. You may prepare several sweet basil cuttings at the same time
  • Cut about 3 to 4 inches off the top
  • Cut just above a set of leaf nodes. In my personal experience, cutting at this point speeds up the rooting process as in the image below.
  • Water the mother plant (to aid in her regeneration)
  • Gently remove all of the leaves with the exception of roughly 3 of the highest and smallest ones
  • Leave the stem in clean water by a windowsill. You may use a single container for several cuttings, as long as they are not overcrowded
  • Be sure to change the water daily or every other day to prevent bacteria-related stem rot. The water should always cover roughly half the length of the stem where roots should grow
  • How to propagate and grow sweet basil from cuttings
    Day 4
  • Depending on your climate, roots are likely to start sprouting after approximately 4 days. (I noticed small roots on my basil cuttings after only 4 days)
  • Remove the seedling from the water when the roots are roughly 1/4 to 1/2 inch long. Although the seedlings will continue to root easily if left in the water for longer, the roots become very entangled if and difficult to separate if you are preparing several cuttings in the same water container 
  • Plant the seedlings individually in 3- to 4- inch plant pots and keep in indirect light until they are strong enough to be planted directly into the ground or into a larger pot
  • For drier climates, mulch around the base of the plant, without allowing the mulch to touch the stem


*** BUY TROPICAL SEEDS ***


General sweet basil plant care
  • For bushier sweet basil plants, pinch off the tops of the plants, especially just above leaf nodes. This will encourage the plants to branch out
  • The pH should be roughly 6.0 to 6.5
  • Water the plant frequently enough to prevent the soil from becoming dry
  • Fertilize with rich regular or worm compost when the foliage turns light green
  • Harvest as early and as much as you like as long as you never remove more than 1 / 3 of the foliage

RELATED TOPICS


August 30, 2014

Moringa Update Grown in the Ground and Pots

This plant (below) was planted in the ground when it was about 3 feet tall. However, it was accidentally broken to a 3-inch stump. I think that accident was a blessing in disguise because this moringa plant might grow into a tree with branches that can be more easily reached than otherwise.

Moringa plant that regrew from a stump after being chopped down
See where the trunk changes color from a harder woody brown to a softer looking green. This is where the original top broke.


Moringa plant that regrew from a stump after being chopped down
See where the trunk changes color from a harder woody brown to a softer looking green. This is where the original top broke.
Moringa plant that regrew from a stump after being chopped down
Moringa Plant of about 2 feet from above

When I filled this moringa plant pot below, I used a combination of sand, compost and leaves. Unfortunately however, the layer of leaves created an impermeable layer. Consequently, when it rained, water collected around the moringa root and was unable to drain out. Moringa plants do not like wet feet and could die. In fact, the leaves started turning yellow and the plant looked very near to death. 


I wanted to keep the plant out in the hot sun as well as keep the soil dry while the impermeable layer broke down. I therefore covered the soil with plastic. I did this by using clothes pins around the stem of my moringa plant and the plant pot edges. After doing this, the moringa plant suddenly began to thrive. Should I also mention that I also performed Reiki on it?


As a side note, I notice that cupid paint brush grows very well around the base of my moringa plants. I have noticed that it always volunteers and thrives at the base of all my moringa plants while it never did well in very rich soil that I once specially prepared for it in a huge container.


If I were to compare the growth patterns of moringa between direct planting (i.e. in the ground) and in pots, the former wins in terms of speed of growth. However, caring for a smaller moringa plant in containers is always easier because I notice that giant African snails seem to like the plant. 

Here is another of my moringa plants. It began to grow upwards very quickly. To encourage it to grow outwards more than upwards, I chopped of the top leaving only one small branch. To prevent rotting, I cut the branches at a slant. I am not certain whether this was a good decision but I also covered the cut points with a downward turned cup. I removed the cup after the branch appeared to have healed sufficiently. Happy for comments and suggestions. Oddly, the new growth around the higher of the 2 cut points shown below emerged inside the cup.
FYI, Do not confuse the moringa plant with the drift wood I used as a trellis for a small malabar spinach vine. The drift wood appears in at a partly horizontal angle.

RELATED ARTICLES


May 27, 2014

Homemade Vermicompost Bin Design

This post shows how to make a vermicompost bin from the bottom up. To follow this simple homemade vermicompost design, you will need the following.
  • 4 buckets that are the same shape and size
  • 2 lids (one for the base, the other the lid)
  • a piece of mosquito net that is roughly twice the diameter of a bucket
  • a drill
  • drill bits (1/8 inch and 3/8 inch)
  • a saw
  • a cool location (preferably not one exposed to harsh direct sunlight)

Clean the buckets especially well if the buckets are being recycled after use for something (like oil or citrus matter) that earthworms do not like in compost bins.
simple homemade vermicompost design


For the base, set aside one of the lids. For leachate reservoir, prepare one bucket as follows. Before you start however, note that, another bucket will fit directly into the bucket that will be used as a leachate reservoir.

Mark the point where the bottom of the higher bucket will reach into the leachate reservoir. On either that point or just below it, drill holes that will establish the top level of the leachate. The leachate will need to drain out into your base if too much leachate accumulate before you are able to use it.
simple vermicompost bin design


For the worm safety net (that will prevent earthworms from falling in and drowning in the leachate reservoir, set aside the net. It should be fitted between the leachate reservoir and the bucket above. Sorry, I did not take any photos.

For the main vermicompost bin section, drill holes at the bottom as well as sides of the bins. The holes at the sides help with ventilation while those at the bottom will allow liquid to drip through the system to become leachate in the reservoir below. Use 3/8 inch drill bits so worms can fit through the holes. This is key since earthworms need to migrate upwards from one vermicompost bin compartment to another when they have completely composted lower levels. Regarding the holes on the sides, drill below the rings that protrude horizontally from the sides of the buckets (i.e. when the buckets are upright).
simple homemade vermicompost design

simple homemade vermicompost design


For the spacer, cut the base of one bin below the protruding rings. The spacer will go between the 2 compost bins to create more vertical space between the bottom of the top and the lower vermicompost bin compartments. More space simply allows you to put more kitchen or other scraps into the vermicompost bin. You may drill 3/8 inch holes if, unlike the case shown below, you leave a lot of the bottom of the sides of the bucket (i.e. below the rings). In the image below, the spacer is in the middle. It was cut very close to the protruding rings.

For the lid, drill as many small holes as you can with the 1/8 inch drill bit. The small holes will enable ventilation but prevent the earthworms from escaping. Good ventilation in a vermi composting system prevents bad odor. In fact, once you have set the system up well, the vermicomposter should be suitable even for a corner in a well ventilated kitchen.
The image below shows the order in which the various parts will be stacked. Oops, we forgot to include the base in this photo. 


OTHER POSTS RELATED TO COMPOSTING

April 15, 2012

Why I grow Seminole (native American) hanging pumpkins in my tropical organic garden

After hearing about the Seminole hanging pumpkins, I became convinced that I would enjoy growing them in my tropical organic garden. Among my various motivators were its long shelf life, taste, practicality and historical interest.

I was impressed by the unusually long shelf life that Seminole hanging pumpkins are purported to have. It is said that, thanks to their exceptionally tough shell, Seminole hanging pumpkins can remain unspolit for as long as a year.

I am always happy to learn about edible flowers that could be added to my salads. It was therefore delightful to know that this pumpkin's flowers are edible. I have found this to be typical of pumpkins with which I am familiar. However, Seminole hanging pumpkins are differentiated from other types of pumpkin on the basis of taste. Specifically, Seminole hanging pumpkins are widely considered to be the sweetest pumpkin.


Regarding appropriate times to harvest, I generally believe that it is best to wait until nature is ready to deliver fruits, ie when they are fully ripe. However, I love the option that I have with Seminole hanging pumpkins. The fruit may be removed prematurely to allow it to ripen otherwise if natural ripening is unfeasible (or not preferred for whatever reason). The greatest foreseeable factor that may encourage me to harvest Seminole hanging pumpkins when they are still quite green is the risk of pest damage.

Quite apart from these interesting benefits of growing seminole hanging pumpkins, I find the history of this species very interesting. Seminole hanging pumpkins were almost made extinct by European who tried to destroy this crop as a means of starving the Seminole Native American communities.

I do recognize however that, although this plant is native to Florida where the Seminole native americans lived, I might encounter some challenges in the hot tropics. Specifically, Seminole hanging pumpkins are known to produce better in cooler months and slow down production in hotter Summer months in Florida.

In light of that, I have already determined my workaround - a microclimate that exists between two closely spaced structures. The structures block both East and West sunlight. Further, a fence that runs between the structures can make a great trellis.

Overall, I think that this plant will be fun and productive.


LINKS RELATED TO GROWING SEMINOLE HANGING PUMPKING

April 11, 2012

My gardening journey & garden tour

Since early childhood, I recognized my unmistakable attraction to the outdoors. At around 9, I leisurely toured a highly innovative self sufficient home farm. It was clear to me even at that tender age that those few hours had left an indelible mark on my mind.
Later, as a teenager, I spent innumerable hours with friends dangling my legs from low hanging branches in a beautiful garden at home. When surrounded by nature, it had such presence that I never felt alone. I so enjoyed it that I found myself mentally snapping photographs of the minutest 'green' detail.

Mystery of how this zuchini became pollinated.
Growing zucchini can be a joy as it is a very prolific plant. Notice how, in the top right portion of the frame, a flower has a tiny 'zucchini' at its base. This is the sign of a female flower. The zucchini at the base is much like an egg; it is awaiting pollination. If successfully pollinated, it would develop into a beautiful zucchini. Otherwise, it will eventually shrivel up and fall off (which is what happened in this case)


As I explained in the introduction of this blog, I was overjoyed by the idea of starting a tropical organic garden just outside my door. I love pets and, although I still consider the sound of paws running through the corridor in the early morning unrivalled among simple life pleasures, I believe that caring for a garden had to be a high priority on my bucket list. It is like caring for pets except that plants, despite their silence, let me know that they are alive with 'loud' responsiveness.

Perhaps my poetic way of describing my garden might prepare you for my confession. Before my gardening journey, my perception of my endeavours was very romantic and unrealistic. Please, what is said in this blog post stays in this blog post! My confession is that I truly thought that all I needed to do was love my garden, provide plenty sun light and water to all of the plants every day, even talk to them occasionally as a bonus and then struggle to keep up with a bountiful harvest.

Anyone who knows anything about gardening knows how uninformed this thinking is. Hopefully, the lives of the plants that I have killed will not stack up as karma against me. Several epiphanies bridged the gap between those initial challenges and the successes that I currently enjoy. However, my key turning point occurred as I watched a video in which an organic gardening guru reiterated the mantra-like saying that "the secret is in the soil". (I laugh when I think about how I had been buying dead top soil for my kitchen garden for several months before I saw that light.)

When I applied that knowledge, the improvement in the health of the garden was absolutely phenomenal. However, I had to learn much more: companion planting, plants with very variable needs regarding water, sun light, pH and nutrients ... not to mention the different organic pest control methods. One day I was so overwhelmed by it all and exclaimed the basis of my epiphany 'Wow! Gardening is a science.'

Walks through my garden are such a celebration of just how far I have come along my gardening journey. I am certainly not a guru by any stretch of the imagination. However, I am just happy to enjoy often abundant harvests of healthy greens, flowers and fruits from my garden. When I harvest, I think of the vibrant colors and patterns as mother nature's wrapping for her gifts. ... And every day is like Christmas. Despite the science of gardening, that 9-year old child still stirs inside me. 

Needless to say, I still have much more to learn. So I just keep plodding on through this gardening journey.   

Aloe vera barbadensis
Aloe vera (barbadensis)


Pepper
It took a while before finally learning that the name of these beautiful peppers is jalapeƱo peppers. Their shape reminds me of old time Christmas tree bulbs.

Dill flower for salads.
Beautiful dill flowers emerging from a salad bowl.


I grow these beats not for their roots but their greens. They are great for salads. Also included are parsley & oregano
Salad greens & herbs


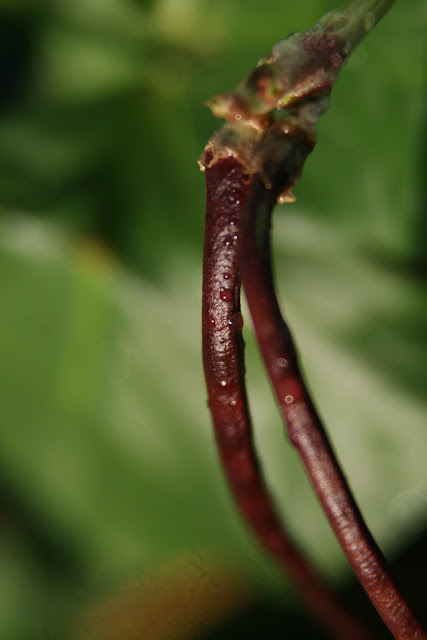
These beans grow so quickly in length. I saw as many as 2 and 3 inches a day. incredible!
Yard long beans

The long story about the beans

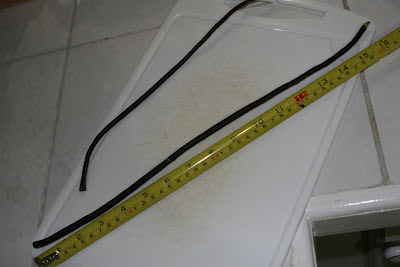
I harvested my yard long beans from my tropical organic garden when they reached 1.5 feet long.
I pick these yard long beans only when they are about 1.5 feet long. If not, something else starts to nibble at it. I've heard that they can get as long as 36 inches.


Why I want to grow moringa oleifera from seed in my tropical organic garden

Claims regarding the (below mentioned) health benefits of moringa are among the most impressive that I have ever encountered. If I had my way, Haitians who still struggle in the wake of the 2010 earthquake would be gifted at least a few moringa seeds (and large pots). Since moringa thrives in poor soil and prefers infrequent watering, planting it in some parts of Haiti may be a manageable feat.

-->
NAMES
Moringa; Drumstick tree; Horseradish tree; Miracle tree; Moringa pterygosperma (archaic); Moringa oleifera
==> BUY MORINGA & OTHER TROPICAL SEEDS  <==
HEALTH BENEFITS OF MORINGA 
The leaves are purported to be many times more nutritionally dense than many renowned health foods. For instance, moringa is said to have many times more vitamin C than oranges, iron than spinach, vitamin A than carrots, protein than yogurt, potassium than bananas and calcium than milk. Furthermore, moringa contains all 9 amino acids along with other nutrients that include Magnesium, Copper and Zinc. Despite its powerful potency, it is even safe enough for lactating mothers and their babies.
==> Steps showing how to germinate moringa seeds 
Moringa oleifera seeds that I germinated for my tropical organic garden


here-->